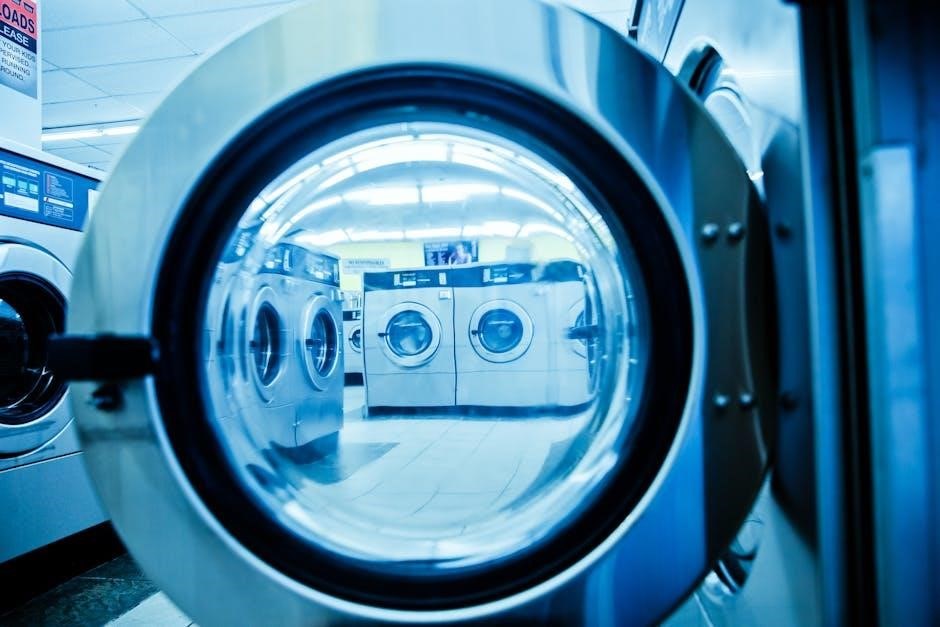
Troubleshooting your Frigidaire dryer ensures efficient operation and prevents costly repairs. Common issues include error codes like E64 and E68, heating problems, and excessive noise. Regular maintenance, such as cleaning vents and checking the lint filter, can resolve many issues. This guide provides step-by-step solutions to diagnose and fix problems effectively, helping you extend your dryer’s lifespan and performance.
1.1 Importance of Regular Maintenance
Regular maintenance is crucial for ensuring your Frigidaire dryer operates efficiently and safely. Failure to maintain the appliance can lead to issues like lint buildup, clogged vents, and excessive noise, which may result in premature wear or even safety hazards. Cleaning the lint filter after each use and inspecting the vent system periodically can prevent blockages that reduce performance and increase energy consumption. Additionally, checking the drum rollers and belts ensures smooth operation and avoids costly repairs down the line. By incorporating these simple maintenance practices, you can extend the lifespan of your dryer, reduce the risk of breakdowns, and maintain optimal drying performance. Regular upkeep also helps in identifying potential problems early, saving time and money.
1.2 Common Issues and Solutions
Frigidaire dryers often face issues like error codes, heating problems, and excessive noise. For example, the E64 error code typically indicates a heating element issue, while E68 may point to a communication problem between the dryer and the washer. If your dryer isn’t heating, check the vent system for blockages or ensure the heating element is functioning. Excessive noise could stem from worn drum rollers or a loose belt; A stuck button might require resetting the control panel. Addressing these issues promptly can prevent further damage and ensure smooth operation. Always refer to your user manual or diagnostic tools for specific guidance. Regular checks and simple fixes can resolve many of these problems effectively, saving time and money.
Quick Start Guide to Troubleshooting
Start by checking the power supply and ensuring the dryer is properly plugged in. Verify error codes and consult the user manual for specific solutions. Perform basic diagnostics like checking vents, lint filters, and belts. Addressing issues early prevents further damage and ensures efficient operation.
2.1 Power Issues
If your Frigidaire dryer won’t turn on, start by checking the power supply. Ensure the dryer is properly plugged into a functioning outlet and that the circuit breaker hasn’t tripped. Verify that no fuses are blown in your home’s electrical panel. If the outlet is shared with other appliances, try plugging the dryer into a dedicated circuit. Check the power cord for damage or frays and replace it if necessary. If the dryer still doesn’t power on, consult the user manual or contact a professional. Power issues are often simple to resolve but can indicate more serious electrical problems if left unaddressed. Always prioritize safety when working with electrical components.
2.2 Basic Diagnostic Steps
Start troubleshooting your Frigidaire dryer by identifying the specific issue. Check for error codes on the display, as they often indicate the problem. Refer to the user manual for code meanings. Next, perform a visual inspection of the dryer’s exterior and interior for signs of damage or blockages. Ensure the lint filter is clean and the vent system is clear, as clogs are a common cause of issues. If the dryer doesn’t heat, inspect the power supply and heating elements. For noise problems, check the drum rollers and belt for wear. Always unplug the dryer before attempting internal repairs to ensure safety. These basic steps can help you diagnose and resolve many common issues efficiently.

Error Codes and Their Meanings
Frigidaire dryer error codes like E64, E68, and E59 indicate specific issues, such as excessive lint, sensor problems, or communication faults. Understanding these codes helps diagnose problems effectively.
3.1 Understanding E64 Error Code
The E64 error code on a Frigidaire dryer typically indicates a problem with the venting system. This could be due to a blocked vent hose or excessive lint buildup. To resolve this, disconnect the vent hose from the dryer and inspect it for obstructions. Clean or replace the vent if necessary. Additionally, ensure the lint filter is clean and that all exterior vent flaps are open to allow proper airflow. If the issue persists, check for kinks or damage in the venting system and repair or replace parts as needed. Proper ventilation is crucial for efficient drying and to prevent further errors.
3.2 Solving E68 Error Code
The E68 error code on a Frigidaire dryer indicates an issue with the moisture-sensing bars. These bars detect moisture levels to optimize drying time. If they become dirty or malfunction, the dryer may display this error. To resolve this, clean the moisture-sensing bars located on the drum’s rear wall using water and a soft brush. Ensure they are free of lint and debris. If cleaning doesn’t fix the issue, inspect for damage or wear. If damaged, replace the moisture-sensing bars. Regular cleaning of these bars can prevent future occurrences of the E68 error, ensuring efficient and accurate drying cycles.
3.3 Addressing E59 Error Code
The E59 error code on a Frigidaire dryer typically indicates a communication issue between the control board and the user interface. This can occur due to a stuck button or faulty wiring. To resolve this, press and release each button on the control panel to ensure none are stuck. If the issue persists, inspect the wiring connections between the control board and the interface for damage or corrosion. Clean or replace any faulty connections. Resetting the dryer by unplugging it for 30 minutes may also resolve the issue. If the problem remains, consult a professional technician to diagnose and repair the control board or related components.
3.4 Fixing E94 Error Code
The E94 error code on a Frigidaire dryer indicates a problem with the thermistor or temperature sensor. The thermistor measures air temperature to regulate heating. If faulty, the dryer may overheat or fail to heat. To fix this, unplug the dryer and locate the thermistor, usually near the heating element. Check for loose connections or damage. Use a multimeter to test the thermistor’s resistance; a reading significantly different from the specified value indicates it needs replacement. Replace the thermistor if necessary and ensure proper installation. If issues persist, the control board may need professional attention. Regular maintenance, like cleaning the vent system, can prevent similar errors from occurring in the future.
Common Issues and Solutions
Frigidaire dryers often face issues like not heating, excessive noise, or not turning on. Regular maintenance, such as cleaning vents and checking the lint filter, resolves many problems.
4.1 Dryer Not Heating
If your Frigidaire dryer is not heating, first ensure the vent system is clear, as blockages can prevent proper airflow. Check the heating element and thermal sensors for damage or malfunction. Verify that the power supply is correct and the circuit breaker hasn’t tripped. Ensure the dryer’s settings are correct, as some cycles don’t use heat. If issues persist, inspect the wiring and connections to the heating element. A faulty thermostat or igniter could also be the cause. Regularly cleaning the lint filter and venting system can help maintain optimal performance and prevent heating issues. Always refer to your user manual for specific diagnostic steps.

4.2 Dryer Not Turning On
If your Frigidaire dryer won’t turn on, start by checking the power source. Ensure the dryer is properly plugged in and the outlet is functioning. Verify that the circuit breaker or fuse hasn’t tripped or blown. Next, inspect the power cord for any visible damage. Check if the dryer’s child lock feature is activated, as this can prevent it from starting. Ensure the door is closed securely, as an open door can disable the start function. If issues persist, examine the control panel for stuck buttons or internal faults. Testing the electrical connections and verifying the continuity of the door switch can also help identify the problem. Always consult your user manual for model-specific troubleshooting steps.
4.3 Dryer Not Tumbling
If your Frigidaire dryer isn’t tumbling, inspect the drum belt for cracks or damage. A broken belt is a common cause and will need replacement. Check the drum rollers and pulleys for wear or obstructions, as these can prevent smooth rotation. Ensure the motor is functioning properly, as a faulty motor can stop the drum from moving. Additionally, verify that the drum itself is free from blockages. If the issue persists, consult a professional to diagnose internal mechanical failures. Regular maintenance, such as cleaning lint buildup and ensuring proper installation, can help prevent tumbling issues. Always refer to your user manual for specific instructions tailored to your dryer model.
4.4 Excessive Noise
Excessive noise from your Frigidaire dryer can indicate worn drum rollers, a faulty drive belt, or a failing motor. Inspect the drum rollers and belt for wear or cracks; replace them if necessary. Lubricating moving parts may reduce friction noise. If the noise persists, check for loose components or debris inside the drum. A rattling sound could signal a loose screw or foreign object. Ensure the dryer is level, as imbalance can cause vibration noise. If the issue is mechanical, such as a faulty motor or pulley, consider professional repair. Regular maintenance, like cleaning lint and ensuring proper installation, can help minimize noise issues. Always unplug the dryer before performing inspections or repairs to ensure safety.
4.5 Unbalanced Operation
An unbalanced Frigidaire dryer can cause vibrations, noise, and uneven drying performance. Ensure the dryer is installed on a level surface; use a carpenter’s level to check alignment. Adjust the legs by turning them clockwise or counterclockwise until the dryer is stable. If the floor is uneven, place shims under the legs for proper leveling. Additionally, check the dryer’s installation brackets and ensure they are securely fastened. Overloading the dryer or unevenly distributing clothes can also cause imbalance. For optimal performance, avoid overloading and ensure clothes are evenly spread. Regularly cleaning the vent system and checking for blockages can also help maintain balance and reduce vibrations during operation.
Maintenance and Prevention Tips
Regular cleaning of the vent system and lint filter ensures efficient airflow and prevents fires. Inspect drum rollers and belts for wear, replacing them as needed annually.
5.1 Cleaning the Vent System
Cleaning the vent system is crucial for maintaining your Frigidaire dryer’s efficiency and safety. Over time, lint and debris accumulate in the vents, restricting airflow and increasing the risk of fires. To clean the vent, disconnect it from the dryer and use a vent brush or vacuum to remove blockages. Regularly inspecting the venting system ensures proper air circulation, which prevents overheating and prolongs the dryer’s lifespan. It’s recommended to clean the vents at least twice a year or more frequently if you notice reduced drying performance. A clean vent system also lowers energy consumption and enhances drying effectiveness.
5.2 Checking the Lint Filter
Regularly checking and cleaning the lint filter is essential for optimal dryer performance. The lint filter catches debris during cycles, preventing it from entering the vent system. Failing to clean it can lead to reduced airflow, longer drying times, and increased energy consumption. To clean the filter, remove it after each use and gently brush off lint with your hands or a soft brush. For deeper cleaning, wash it with mild soap and let it dry completely before reinstalling. Neglecting the lint filter can also increase the risk of fires and damage to internal components. Ensure the filter is securely in place before running the dryer to maintain proper function and safety.

5.3 Inspecting Drum Rollers
Inspecting the drum rollers is crucial for ensuring smooth operation and preventing excessive noise or malfunction. Over time, these rollers can wear out or become misaligned, leading to issues like poor tumbling action or unusual sounds. To inspect them, unplug the dryer and remove the drum. Check each roller for signs of wear, such as cracks or excessive play. If damaged, replace the rollers promptly. Lubricate the rollers periodically to maintain smooth movement. Regular inspection prevents overheating and extends the dryer’s lifespan. Neglecting this step can lead to more severe problems, such as the drum stopping altogether. Always ensure the rollers are securely in place and functioning properly before reinstalling the drum and operating the dryer.
5.4 Belt Replacement
The dryer belt plays a critical role in rotating the drum. If the belt is worn, cracked, or broken, the drum will not turn, leading to poor drying performance. To replace the belt, unplug the dryer and access the internal components by removing the back panel or top. Locate the belt pulley system and carefully remove the old belt. Install the new belt, ensuring it is properly aligned and seated on the pulleys. Tighten any related tensioners to maintain the correct belt tension. For specific models like the Frigidaire Affinity series, refer to the user manual for detailed instructions. Regularly inspecting and replacing the belt prevents unexpected breakdowns and ensures smooth operation. A worn belt can also cause excessive noise, so addressing it early is essential. Always ensure the belt is the correct size and type for your model to avoid further issues.

Advanced Troubleshooting Techniques
Advanced troubleshooting involves using diagnostic modes, checking electrical connections, and testing sensors to identify complex issues. It requires expert tools and knowledge, ensuring comprehensive analysis.
6.1 Using Diagnostic Modes
Activating diagnostic modes on your Frigidaire dryer allows you to retrieve error codes and perform advanced tests. To access this mode, press and hold the Options and Select buttons simultaneously for 10 seconds. The display will show a list of error codes or diagnostic information. This feature helps identify issues such as faulty sensors, clogged vents, or malfunctioning components. Once in diagnostic mode, you can navigate through the menu to test specific functions like heating elements or motor operation. If an error code appears, refer to the user manual or online resources to understand its meaning, such as E64 for venting issues or E68 for sensor problems. This step-by-step approach ensures accurate troubleshooting and efficient repairs.
6.2 Checking Electrical Connections
Ensuring all electrical connections are secure is crucial for your Frigidaire dryer’s proper operation. Start by unplugging the dryer and inspecting the power cord for any signs of damage or wear. Check the terminal block connections at the back of the dryer, as loose or corroded connections can cause malfunctions. Verify that the electrical outlet is functioning correctly by testing it with another appliance. If issues persist, inspect the dryer’s internal wiring, particularly the control board relays, which may fail and prevent the motor or heating element from working. Tightening or replacing faulty connections can often resolve problems like the dryer not turning on or heating. Always refer to the user manual for specific instructions and safety precautions during this process.
6.3 Testing Thermal Sensors
Thermal sensors in your Frigidaire dryer play a crucial role in regulating temperature and preventing overheating. To test them, start by unplugging the dryer for safety. Locate the thermal sensors, usually found near the heating element or exhaust duct. Use a multimeter to check for continuity; a functioning sensor should show no resistance (0 ohms). If the sensor is faulty, it may display infinite resistance, indicating it needs replacement. Additionally, ensure the sensor is clean and free from lint buildup, as blockages can cause inaccurate readings. If testing reveals a malfunction, refer to the dryer’s service manual for specific replacement instructions. Properly functioning thermal sensors are essential to avoid issues like error codes (e.g., E64) and ensure safe, efficient drying cycles.

Repair and Replacement Costs
Repair costs for Frigidaire dryers vary; DIY fixes (e.g., belts or fuses) cost $50-$200, while professional services can range up to $200 for parts and labor. Early detection saves money.
7.1 DIY Repair Costs
DIY repairs for Frigidaire dryers are cost-effective, with most parts available at hardware stores or online. A replacement belt costs between $20 to $50, while a heating element may range from $50 to $100. Lint filters and vent hoses are typically inexpensive, priced around $10 to $30. For more complex issues, like a faulty thermostat or thermal sensor, costs can increase to $50-$150. However, these repairs often require basic tools and mechanical skills. By addressing issues early, homeowners can save significantly compared to hiring a professional. Always ensure to follow safety guidelines and manufacturer instructions when performing DIY repairs.
7.2 Professional Repair Costs
Hiring a professional to repair your Frigidaire dryer can vary in cost depending on the issue. Diagnostic fees alone can range from $50 to $150, with additional charges for parts and labor. For common problems like a faulty heating element or motor, expect to pay between $200 to $500. More complex repairs, such as control board replacements, can cost upwards of $400 to $700. In some cases, if multiple components need replacement, costs may exceed $1,000. It’s essential to compare quotes from licensed technicians and check for any available warranties to minimize expenses. Professional repairs ensure safety and reliability, especially for intricate issues beyond DIY capabilities.
Regular maintenance and timely troubleshooting can significantly extend your Frigidaire dryer’s lifespan. Always clean vents, check filters, and address error codes promptly. DIY fixes save costs, but consult professionals for complex issues. Stay proactive to ensure optimal performance and safety.
8.1 Summary of Key Points
Regular maintenance is crucial for optimal dryer performance. Cleaning vents, checking filters, and addressing error codes promptly prevents major issues. Common problems include no heat, noise, or failure to tumble. DIY fixes like belt replacements or unclogging vents can save costs. However, complex issues may require professional intervention. Error codes like E64, E68, and E59 indicate specific malfunctions, guiding targeted repairs. Proactive troubleshooting extends the appliance’s lifespan. Always refer to diagnostic modes and user manuals for precise solutions. Balancing DIY efforts with professional help ensures safety and efficiency. By following these tips, you can maintain your Frigidaire dryer effectively and avoid unnecessary expenses.
8.2 Recommended Resources
For further assistance, consult Frigidaire’s official website and user manuals for detailed repair guides. Online forums and repair communities offer valuable insights and solutions from experienced technicians. YouTube tutorials provide visual step-by-step instructions for common fixes. Local appliance repair services, such as those listed on Yelp, can offer professional assistance. Additionally, diagnostic tools and replacement parts can be sourced from authorized retailers. Always refer to trusted sources to ensure safety and compatibility when troubleshooting and repairing your Frigidaire dryer.